The Dell Vista system can normally be restored to factory settings through a selection on the Vista Advanced Boot Options screen. To perform a factory restore, first try the F8 method, "Dell Factory Image Restore Option in the System Recovery Options Menu". If that doesn't work, next try the DVD method, "Run PC Restore From a Microsoft Windows Vista DVD".
Try the above two procedures first. If neither of those works, try directly accessing the factory image using the procedure below. Note this procedure assumes the Factory.wim file is still intact and has not been damaged.
(Note: Click on any image below to view a larger image. Click your browser's 'Back' button to return to this page.)

Screen 1:
Boot from the Vista Recovery CD
Insert the Vista Recovery DVD in the CD/DVD drive.
Reboot the computer.
At the POST ("Power-On Self Test") screen with the giant Dell logo, press F12 a few times to get to the BIOS One-Time Boot Menu.
At the One-Time Boot Menu, select the option to boot from CD/DVD.
Press any key when you see the prompt, "Press any key to boot from CD or DVD.."
The Windows Recovery Environment will begin loading files.

Screen 2:
Select your language.

Screen 3:
Click the "Next" button to continue.

Screen 4:
Select the option to "Repair your computer".

Screen 5:
If you see this screen, click "No".
(We're going to restore the Vista partition from the Dell factory image, so we do not need to repair the existing Vista installation.)
(We're going to restore the Vista partition from the Dell factory image, so we do not need to repair the existing Vista installation.)

Screen 6:
Click the "Next" button to continue.
Screen 7:
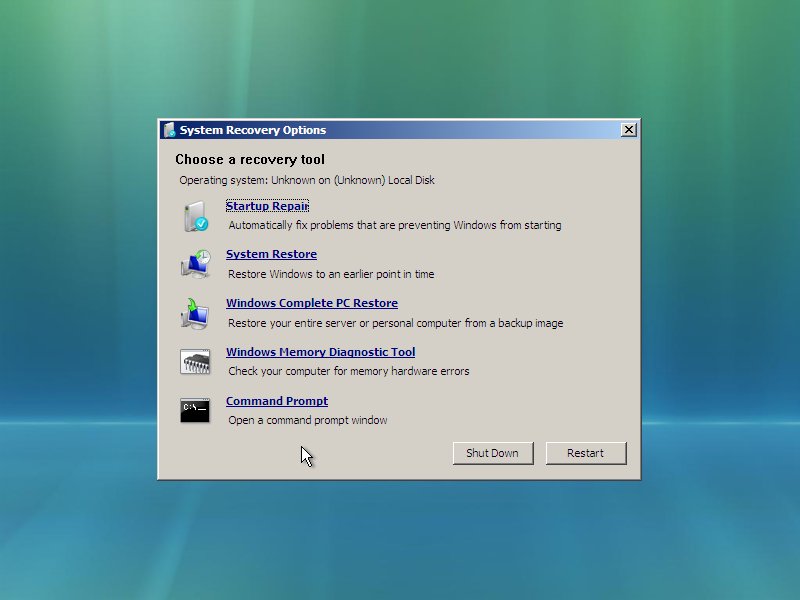
This is the main System Recovery Options menu.
We will use the "Command Prompt" option to perform the factory image restore. However, to avoid accidentally overwriting the wrong partition, it would be wise to first confirm the drive letters the Recovery Environment has assigned to the relevant partitions.
To check the drive letters, select the "Windows Complete PC Restore" option.
Screen 8:
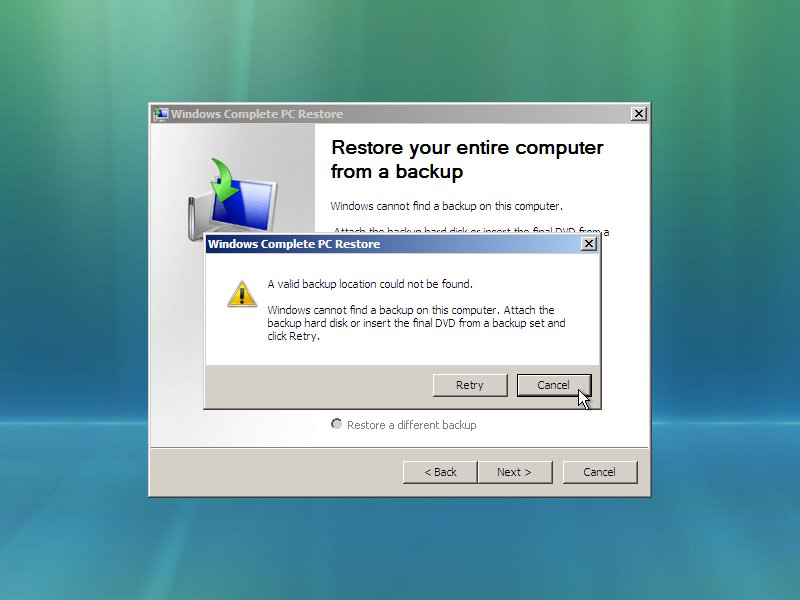
To check the drive letters, select the "Windows Complete PC Restore" option from the System Recovery Options menu.
If you see this dialog box, click the "Cancel" button to tell Windows to stop looking for a Windows backup.
("Retry" just returns to this same dialog box.)
If you see this dialog box, click the "Cancel" button to tell Windows to stop looking for a Windows backup.
("Retry" just returns to this same dialog box.)

Screen 9:
Click the "Next" button to continue.
("Cancel" returns to the System Recovery Options menu.)
("Cancel" returns to the System Recovery Options menu.)
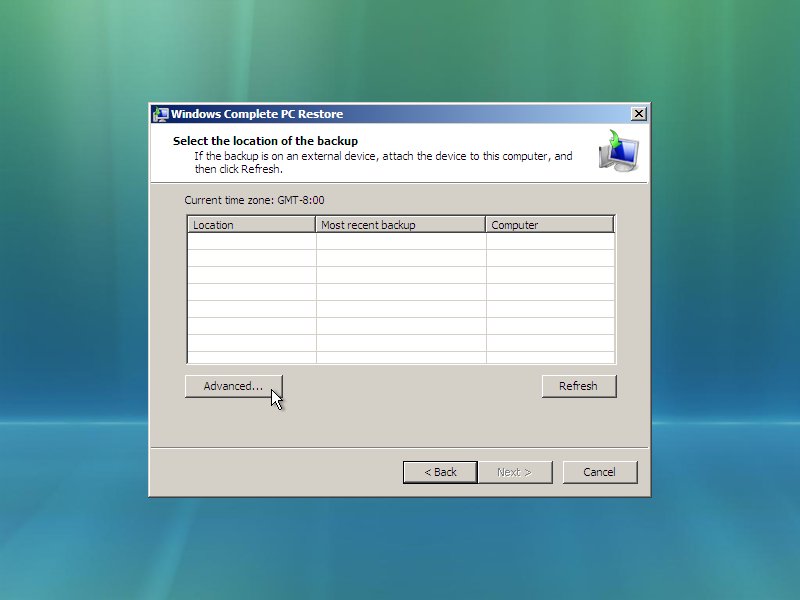
Screen 10:
Click the "Advanced.." button.
("Cancel" returns to the System Recovery Options menu.)
("Cancel" returns to the System Recovery Options menu.)

Screen 11:
Click "Install a driver" to continue.
(Note: we are not going to install a driver, but the other two options, "Search.." and "Cancel", will not let us continue.)
(Note: we are not going to install a driver, but the other two options, "Search.." and "Cancel", will not let us continue.)

Screen 12:
Click the "OK" button to continue.
("Cancel" returns to the System Recovery Options menu.)
("Cancel" returns to the System Recovery Options menu.)

Screen 13:
Click the "Computer" button to show the drive letters that the Recovery Environment has assigned to the drives.
(Note: your computer may show different drive labels or sizes than shown in this example.)
On a Dell-configured hard disk, the main Vista OS partition will be identified as drive C: with the label "OS", and the Recovery partition will be identified as drive D: with the label "RECOVERY". If you have readjusted the partition layout, you may have different labels or drive letters.
You may double-click any drive letter icon to study the files and folders in each partition. Once you are satisfied that you know the drive letters of the Recovery partition and the partition we are going to overwrite, press "Cancel" until you return to the System Recovery Options menu (screen 7).

Screen 14:
From the System Recovery Options menu, select the "Command Prompt"
option.
The following instructions assume the Recovery partition (as determined
in screen 13) is drive D: and the Vista OS partition to be overwritten
is C:.
At the command prompt, type "d:" and press [Enter].
At the 'D:\' command prompt, type "cd \tools" and press [Enter].
At the 'D:\Tools' command prompt, type the following command:
At the command prompt, type "d:" and press [Enter].
At the 'D:\' command prompt, type "cd \tools" and press [Enter].
At the 'D:\Tools' command prompt, type the following command:
imagex /apply d:\dell\image\factory.wim 1 c:\When you press the [Enter] key, the ImageX utility will begin overwriting the C: partition with the contents of the Factory.wim image.
Finished.
The Vista OS partition should now be restored to its contents as it was when originally shipped.
Reboot and the computer should boot into Vista.
The Vista OS partition should now be restored to its contents as it was when originally shipped.
Reboot and the computer should boot into Vista.
I just need to say this is a well-informed article which you have shared here about forex trading. It is an engaging and gainful article for us. Continue imparting this sort of info, Thanks to you.Server Management Naples FL
ReplyDeleteYou've written an excellent post of computer repair shop, and you've shared it with us. Your article provided me with some unique and useful knowledge. I appreciate you sharing this text with us.
ReplyDeleteYour blog contains lots of valuable data. It is a factual and beneficial article for us. repair phone screen Thankful to you for sharing an article like this.
ReplyDeleteI read the above article and I got some knowledge from your article. It's actually great and useful data for us. Thanks for share it.Macbook Air A1932 Logic Board
ReplyDelete